
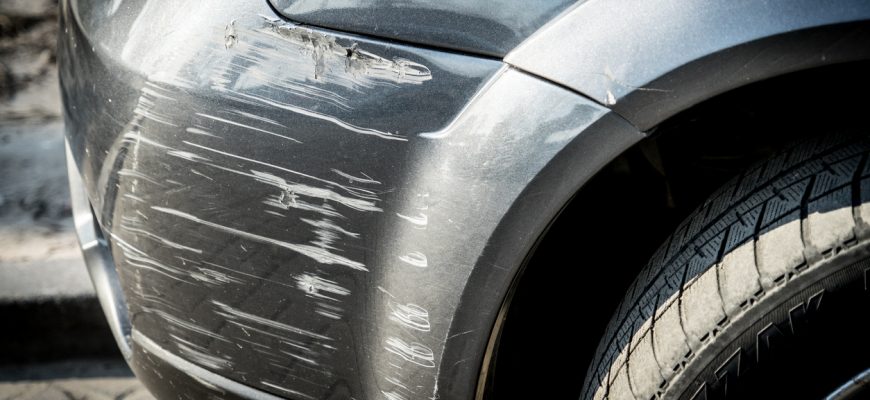
Cracked bumpers are a common issue for many vehicle owners, often resulting from minor accidents or wear and tear. However, repairing a cracked bumper can be a straightforward task if you have the right tools and approach. In this guide, we will walk you through the steps necessary to restore your bumper to its former glory, saving you time and money compared to professional repairs.
- Materials Needed
- Step 1: Assess the Damage
- Step 2: Prepare the Area
- Step 3: Sand the Cracked Area
- Step 4: Apply the Adhesive
- Step 5: Fill the Crack
- Step 6: Sand the Filler
- Step 7: Paint the Bumper
- Step 8: Apply Clear Coat
- Step 9: Remove Masking Tape and Final Inspection
- 1. Take Your Time
- 2. Use a Heat Gun for Flexibility
- 3. Test Paint Matches
- 4. Consider UV Protection
- 5. Keep a Repair Journal
- 6. Know When to Seek Professional Help
Materials Needed
- Sandpaper (80, 120, and 220 grit)
- Plastic bumper repair kit (includes adhesive and filler)
- Paint (matched to your vehicle’s color)
- Clear coat
- Masking tape
- Clean cloths
- Rubbing alcohol or degreaser
- Gloves and safety goggles
Step 1: Assess the Damage
Before diving into repairs, take a close look at the crack. Determine the extent of the damage—whether it’s a minor crack or a larger break. This will help you decide on the appropriate repair techniques and materials needed. For small cracks, a filler may suffice, while larger breaks might require reinforcement.
Step 2: Prepare the Area
Clean the damaged area thoroughly using rubbing alcohol or a degreaser to remove any dirt, grease, or wax. Once cleaned, dry it with a cloth. Use masking tape to outline the repair area, preventing damage to the surrounding paint.
Step 3: Sand the Cracked Area
Using 80-grit sandpaper, sand the area around the crack. This roughens the surface, allowing the adhesive to bond better. Be sure to feather the edges of the paint to avoid noticeable bumps after painting. After sanding, switch to 120-grit sandpaper for a smoother finish, and wipe away any dust with a clean cloth.
Step 4: Apply the Adhesive
Follow the instructions on your plastic bumper repair kit. Typically, you’ll mix the adhesive and apply it directly into the crack. Use a putty knife or a similar tool to ensure the adhesive fills the crack completely. Let it cure as per the manufacturer’s instructions.
Step 5: Fill the Crack
If the crack is deep, use the filler included in your repair kit to build up the surface. Apply it in layers, allowing each layer to dry before adding the next. Once you’ve achieved an even surface, let it cure fully.
Step 6: Sand the Filler
Once the filler has dried completely, sand it down using 220-grit sandpaper until it is flush with the surrounding bumper. The goal is to create a smooth transition from the repair to the original bumper surface. Wipe away any dust again to prepare for painting.
Step 7: Paint the Bumper
Using a spray can or paint gun, apply the matched paint to the repaired area. Start with a light coat and allow it to dry before applying additional coats as needed. Remember to follow the manufacturer’s instructions for the best results;
Step 8: Apply Clear Coat
After the paint has dried, apply a clear coat to protect the repair and give it a glossy finish. This step is crucial for blending the repair with the existing bumper paint. Allow the clear coat to dry thoroughly.
Step 9: Remove Masking Tape and Final Inspection
Carefully remove the masking tape from around the repair area. Inspect your work closely to ensure that the repair is smooth and the paint matches well. If necessary, you can do minor touch-ups with a fine brush.
Repairing a cracked bumper can be a rewarding DIY project that not only saves money but also enhances your vehicle’s appearance. With careful preparation and attention to detail, you can achieve a professional-looking repair right at home. Remember, practice makes perfect, so don’t hesitate to tackle this project with confidence!
While the outlined steps provide a solid foundation for repairing a cracked bumper, there are several additional tips and tricks that can enhance your repair process and ensure a more professional finish.
1. Take Your Time
Rushing through the repair can lead to mistakes. Each step should be approached with patience, particularly when it comes to sanding and painting. Allow each layer of adhesive, filler, and paint to cure fully before moving on to the next step to avoid compromising the integrity of the repair.
2. Use a Heat Gun for Flexibility
If your bumper is made of flexible plastic, consider using a heat gun to gently warm the area around the crack before applying adhesive. This can make the plastic more pliable, allowing for better adhesion and a smoother repair. However, be cautious not to overheat the material, as it can warp.
3. Test Paint Matches
When selecting paint, always test a small area first. Different manufacturers may have variations in color, even if the paint codes appear to match. Spraying a test patch on a hidden part of the bumper can help you confirm the color match before proceeding with the entire repair.
4. Consider UV Protection
After applying the clear coat, consider using a UV protectant spray designed for automotive finishes. This can help prevent fading and cracking from sun exposure over time, ensuring your repair looks fresh for longer.
5. Keep a Repair Journal
If you find yourself frequently repairing your bumper or other parts of your vehicle, consider keeping a repair journal. Documenting your repairs can help you track what worked well, what didn’t, and any specific techniques or products that proved particularly effective.
6. Know When to Seek Professional Help
While many bumper repairs can be handled at home, some situations may require professional assistance. If the damage is extensive, such as a deep dent or structural issues with the bumper itself, it might be wise to consult an expert. Safety should always be your top priority.
Repairing a cracked bumper is an achievable DIY task that can enhance your vehicle’s appearance and save you money. With the right tools, materials, and a little patience, you can perform a repair that not only restores functionality but also looks great. Remember to take your time, follow best practices, and don’t hesitate to seek professional help if needed. Happy repairing!


I had a crack in my bumper for months, and this article gave me the confidence to fix it myself. The materials list was spot on!
This is a must-read for anyone involved in environmental safety. Well done on covering such an important topic!
I loved how detailed this piece is. The step-by-step approach makes it accessible for everyone!
I appreciate how detailed this article is. The sanding tips were particularly useful. My repair turned out better than I expected!
‘Fantastic article! It highlights the importance of preparedness when dealing with gas spills.’
Great instructions! I followed them step by step, and my bumper looks brand new. Highly recommend this guide to anyone dealing with similar issues.
Great insights! The tips for using absorbent materials are practical and easy to understand.
This guide is incredibly helpful! I never thought I could repair my bumper myself, but the steps are so clear and easy to follow. Thank you!
‘The information on assessing the spill size was particularly enlightening. Thanks for sharing these best practices!’
The article is very informative. I didn’t realize how crucial it is to control ignition sources during a spill cleanup.