
A blower motor resistor is a crucial component in your vehicle’s HVAC system‚ controlling the fan speed. When it fails‚ you might experience only high-speed fan operation or no fan at all. Diagnosing a faulty resistor often involves using a multimeter to test its resistance. This guide will walk you through the process.
Tools and Materials
- Multimeter
- Vehicle repair manual (optional‚ but highly recommended)
- Screwdrivers (Phillips and/or flathead‚ depending on your vehicle)
- Safety glasses
Safety Precautions
Always disconnect the negative battery terminal before starting any electrical work on your vehicle. This prevents accidental shorts and protects you from electrical shock. Wear safety glasses to protect your eyes from any potential debris.
Locating the Blower Motor Resistor
The location of the blower motor resistor varies depending on the make and model of your vehicle. Consult your vehicle’s repair manual for the precise location. It’s often found behind the dashboard‚ near the blower motor itself‚ or sometimes under the glove compartment.
Testing the Blower Motor Resistor
- Disconnect the electrical connector: Carefully unplug the electrical connector from the blower motor resistor.
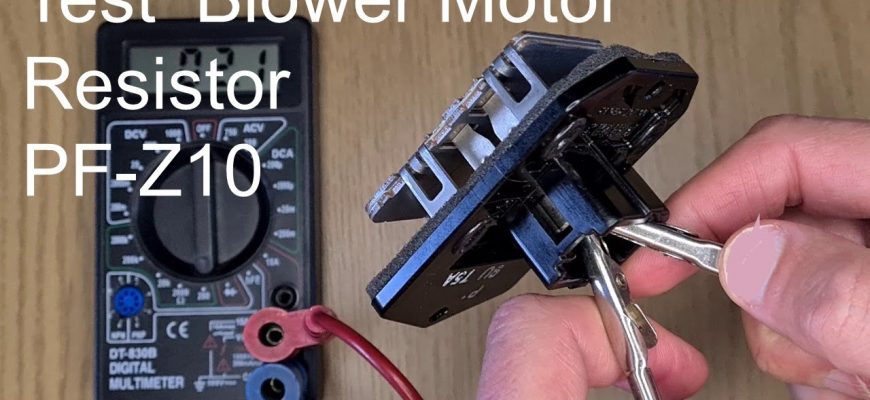
- Set your multimeter to ohms (Ω): This setting measures resistance.
- Test each resistor terminal: Your resistor will have multiple terminals. Your repair manual will show you the resistor’s wiring diagram‚ indicating the resistance values you should expect between each terminal pair. Place the multimeter probes on each terminal pair and record the readings. Compare these readings to the values specified in your repair manual.
- Interpret the results: If the resistance readings are significantly different from the specified values (often within a tolerance of ±10%)‚ the resistor is likely faulty and needs replacement. An open circuit (infinite resistance reading – “OL” on the multimeter) indicates a complete failure. A short circuit (near zero resistance) also suggests a problem.
Replacing the Blower Motor Resistor
If your tests reveal a faulty resistor‚ replace it with a new one. Again‚ consult your repair manual for detailed instructions. Remember to reconnect the battery terminal after the replacement.
Troubleshooting Tips
- Double-check your connections: Ensure the multimeter probes are firmly connected to the resistor terminals.
- Check for corroded terminals: Corrosion can affect resistance readings. Clean the terminals with a wire brush if necessary.
- Consult your repair manual: It provides specific information for your vehicle model.
By following these steps‚ you can effectively check your blower motor resistor and determine if it needs replacing. Remember safety first and always consult your vehicle’s repair manual for specific instructions and diagrams.


Great diagrams would have been a helpful addition, but the written instructions are very good.
This article is well-written and easy to understand, even for someone with limited automotive experience.
A valuable resource for car enthusiasts and DIY mechanics. The safety tips are particularly important.
Very helpful! The step-by-step instructions with the multimeter were easy to follow. I appreciate the inclusion of safety precautions.
Simple, straightforward, and effective. I highly recommend this guide to anyone experiencing blower motor issues.
A clear and concise guide to diagnosing a faulty blower motor resistor. The emphasis on safety is excellent.
Excellent tutorial! The advice to consult the vehicle repair manual is crucial for accurate testing.
This guide is a lifesaver! I was able to diagnose and fix my blower motor resistor problem thanks to this clear explanation.