Maintaining your vehicle’s cooling system is crucial for optimal engine performance and longevity. One essential part of this maintenance is the process known as “burping” the coolant system. This procedure helps to remove air pockets that can lead to overheating and other performance issues. In this guide, we’ll walk you through the steps to effectively burp your coolant system.
- What Does It Mean to “Burp” the Coolant System?
- Materials Needed
- Step-by-Step Process
- Step 1: Safety First
- Step 2: Locate the Radiator Cap
- Step 3: Remove the Radiator Cap
- Step 4: Check Coolant Levels
- Step 5: Start the Engine
- Step 6: Observe the Bubbles
- Step 7: Rev the Engine
- Step 8: Replace the Radiator Cap
- Step 9: Check Coolant Levels Again
- Step 10: Test Drive
- Understanding the Importance of a Properly Functioning Cooling System
- Signs Your Cooling System Needs Attention
- Common Mistakes to Avoid When Burping Your Coolant System
- When Should You Seek Professional Help?
- Final Thoughts
- Additional Resources
What Does It Mean to “Burp” the Coolant System?
“Burping” the coolant system refers to the process of removing trapped air from the cooling system of your vehicle. Air pockets can form when the coolant is drained or replaced, and these pockets can impede the flow of coolant, leading to inefficient cooling and potential engine damage. By burping the system, you ensure that the coolant circulates properly, helping to regulate engine temperature effectively.
Materials Needed
- Coolant (recommended by your vehicle manufacturer)
- Funnel
- Ratchet set (if necessary to access the radiator cap)
- Gloves
- Safety goggles
Step-by-Step Process
Step 1: Safety First
Before you start, ensure your vehicle is parked on a level surface and the engine is cool. Wear gloves and safety goggles to protect yourself from any coolant spills or splashes.
Step 2: Locate the Radiator Cap
Open the hood and locate the radiator cap. It is usually found on top of the radiator or on the engine coolant reservoir. If necessary, consult your vehicle’s manual for specific locations.
Step 3: Remove the Radiator Cap
With the engine cool, carefully remove the radiator cap. If the cap is difficult to turn, use a ratchet set to loosen it. Be cautious, as some residual pressure may still be present.
Step 4: Check Coolant Levels
Inspect the coolant level in the radiator. If it is low, add the recommended coolant using a funnel until it reaches the proper level. This helps to ensure that there is enough fluid to prevent air pockets from forming.
Step 5: Start the Engine
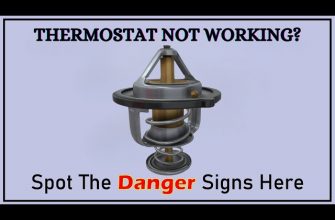
With the radiator cap off, start your engine and allow it to warm up. As the engine runs, the thermostat will open, and coolant will begin to circulate through the system.
Step 6: Observe the Bubbles
As the engine warms up, you may notice bubbles rising to the surface in the radiator. This is a sign that trapped air is escaping. Allow the engine to run for a few minutes until the bubbling slows down significantly.
Step 7: Rev the Engine
While the engine is running, gently rev it a few times. This action can help to dislodge any remaining air pockets in the system. Keep an eye on the temperature gauge to ensure the engine does not overheat.
Step 8: Replace the Radiator Cap
Once you notice that the bubbling has nearly stopped, carefully replace the radiator cap. Ensure it is securely fastened to prevent any coolant leaks.
Step 9: Check Coolant Levels Again
After the engine has cooled down, check the coolant level once more. If it has dropped significantly, add more coolant to maintain the proper level.
Step 10: Test Drive
Take your vehicle for a short drive to ensure that the cooling system is functioning correctly. Monitor the temperature gauge during your drive to confirm that the engine is not overheating.
Burping your coolant system is a simple yet vital maintenance task that can enhance your vehicle’s performance and prevent overheating issues. By following this step-by-step guide, you can ensure that your engine runs smoothly and efficiently. Remember, regular maintenance and checks of your coolant system can save you from costly repairs down the line.
So, roll up your sleeves, gather your materials, and get ready to keep your engine cool!
Understanding the Importance of a Properly Functioning Cooling System
Before diving deeper into the intricacies of burping the coolant system, it’s crucial to recognize why maintaining this system is essential for your vehicle. The cooling system is responsible for regulating the engine’s temperature, ensuring it operates efficiently and preventing overheating. A malfunctioning cooling system can lead to severe engine damage, resulting in costly repairs or even complete engine failure.
Signs Your Cooling System Needs Attention
Being proactive about your vehicle’s cooling system can save you from unexpected breakdowns. Here are some signs that might indicate your coolant system needs a thorough inspection or burping:
- Overheating Engine: If the temperature gauge consistently rises above normal levels, it may indicate trapped air affecting coolant flow.
- Coolant Leaks: Puddles of coolant under your vehicle can signify a leak, which could also contribute to air entering the system.
- Unusual Noises: Gurgling or bubbling sounds from the radiator can indicate air pockets within the coolant system.
- Heater Issues: If your vehicle’s heater is only blowing cold air, it could mean the coolant is not circulating properly.
Common Mistakes to Avoid When Burping Your Coolant System
While burping the coolant system is straightforward, there are common pitfalls to avoid:
- Neglecting to Let the Engine Cool: Always ensure the engine is cool before removing the radiator cap to avoid burns from hot coolant.
- Overfilling the Radiator: Adding too much coolant can lead to overflow and may create additional pressure in the system.
- Ignoring Manufacturer Guidelines: Different vehicles may have specific procedures for burping the coolant system. Always refer to your owner’s manual for tailored instructions.
- Forgetting to Check for Leaks: After completing the burping process, it’s vital to check for leaks that may have developed during the procedure.
When Should You Seek Professional Help?
While many vehicle owners can handle burping the coolant system themselves, some situations warrant professional assistance. If you notice persistent overheating, coolant leaks that are difficult to locate, or if your vehicle’s cooling system has not been serviced in a long time, it may be wise to consult a mechanic. They can provide a thorough inspection and ensure that all components of the cooling system, including the radiator, thermostat, and hoses, are functioning correctly.
Final Thoughts
Burping the coolant system is a critical maintenance task that every vehicle owner should be familiar with. By following the steps outlined in this guide, you can help ensure that your engine stays cool and operates efficiently. Regular maintenance of your cooling system not only prolongs the life of your vehicle but also enhances your driving experience. So, don’t wait for the warning signs—stay ahead of the game and keep your vehicle running smoothly!
Additional Resources
If you’re interested in learning more about vehicle maintenance or have specific questions about your car’s cooling system, consider exploring forums, online tutorials, or automotive workshops. Knowledge is power when it comes to vehicle care, and staying informed will empower you to tackle maintenance tasks with confidence.


This article is incredibly informative! I never knew how important it was to burp the coolant system until now. Thanks for the detailed steps!
Great guide! I followed the steps exactly as described, and my car is running much smoother now. Highly recommend it!
I appreciate the emphasis on safety! The tips about wearing gloves and goggles are essential for anyone attempting this procedure.
The explanation of what “burping” means was really helpful. I had no idea air pockets could cause such issues!
I love how thorough this article is! The materials list at the beginning made it easy to prepare before starting.
Thanks for breaking down the process into easy-to-follow steps! I feel more confident tackling my car