
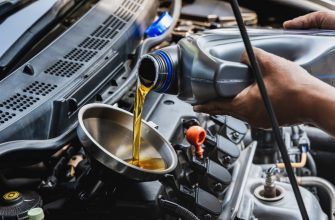
The manifold absolute pressure (MAP) sensor plays a crucial role in your vehicle’s engine management system. It measures the pressure inside the intake manifold, providing the engine control unit (ECU) with essential data to optimize fuel injection and ignition timing. Over time, however, dirt and oil can accumulate on the sensor, leading to engine performance issues and triggering warning lights. Cleaning the MAP sensor can restore its functionality and improve your vehicle’s performance. Here’s a step-by-step guide on how to do it safely and effectively.
- Tools and Materials Needed
- Step 1: Safety First
- Step 2: Locate the MAP Sensor
- Step 3: Remove the Wiring Harness
- Step 4: Remove the MAP Sensor
- Step 5: Clean the Sensor
- Step 6: Reinstall the MAP Sensor
- Step 7: Reconnect the Battery and Test Drive
- Step 8: Monitor for Issues
- Additional Maintenance Tips
- When to Seek Professional Help
- The Importance of Regular Maintenance
- Signs It’s Time for a Check-Up
- DIY vs. Professional Help
Tools and Materials Needed
- Safety goggles
- Gloves
- Socket wrench set
- Screwdriver set
- MAP sensor cleaner or electronic cleaner spray
- Soft cloth or paper towel
- Compressed air (optional)
Step 1: Safety First
Before you start cleaning the MAP sensor, ensure that your vehicle is parked on a flat surface, with the engine turned off and cooled down. Disconnect the negative battery terminal to avoid any electrical short circuits during the cleaning process.
Step 2: Locate the MAP Sensor
The MAP sensor is usually located on or near the intake manifold. Consult your vehicle’s service manual for the exact location, as it can vary between makes and models. Once located, take note of the wiring harness connected to it.
Step 3: Remove the Wiring Harness
Carefully disconnect the wiring harness from the MAP sensor. This may require a gentle tug or pressing a tab to release it. Be cautious not to damage the connectors as this can lead to further issues.
Step 4: Remove the MAP Sensor
Using a socket wrench or screwdriver, remove the bolts securing the MAP sensor to the manifold. Keep these bolts in a safe place, as you will need them for reinstallation. Once removed, gently pull the sensor away from its mounting location.
Step 5: Clean the Sensor
Using the MAP sensor cleaner, spray the sensor generously while keeping it at a safe distance (about 6-8 inches). Avoid touching the sensor’s delicate components with your fingers or any hard materials. Allow the cleaner to evaporate, and use a soft cloth or paper towel to gently wipe the exterior.
If necessary, use compressed air to blow out any remaining debris or contaminants from the sensor;
Step 6: Reinstall the MAP Sensor
Once the sensor is clean and dry, carefully reposition it back onto the intake manifold. Secure it in place with the bolts you removed earlier, ensuring they are tightened properly but not over-torqued. Reconnect the wiring harness, making sure it clicks into place snugly.
Step 7: Reconnect the Battery and Test Drive
Reconnect the negative battery terminal and start the engine. Allow it to idle for a few minutes, listening for any unusual sounds or warning lights on the dashboard. Take the vehicle for a short drive to test its performance. You should notice improved throttle response and overall engine efficiency.
Cleaning the MAP sensor is a straightforward task that can significantly enhance your vehicle’s performance and fuel efficiency. Regular maintenance can prevent the buildup of dirt and oil, keeping your engine running smoothly. If you continue to experience issues after cleaning, it may be time to consult a professional mechanic for further diagnosis.
By following these steps, you can ensure that your MAP sensor remains in optimal condition, helping your engine perform at its best.
Step 8: Monitor for Issues
After cleaning and reinstalling the MAP sensor, it’s essential to keep an eye on your vehicle’s performance over the next few days. Watch for any warning lights on the dashboard, unusual engine behavior, or changes in fuel efficiency. If you experience persistent issues, it may indicate a deeper problem within the engine or the sensor itself might need replacement.
Additional Maintenance Tips
To ensure the longevity of your MAP sensor and overall engine health, consider these additional maintenance tips:
- Regular Inspections: Periodically check the sensor and its connectors for signs of wear, corrosion, or damage.
- Engine Air Filter Replacement: A clean air filter helps prevent dirt and debris from entering the intake system, reducing the likelihood of sensor contamination.
- Fuel System Cleaning: Consider using fuel system cleaners that can help keep injectors and sensors free from buildup.
- Follow Manufacturer Guidelines: Adhere to your vehicle’s maintenance schedule as outlined in the owner’s manual, including timely inspections of critical components.
When to Seek Professional Help
If after cleaning the MAP sensor you still face performance issues, it may be time to consult a professional mechanic. They can perform a diagnostic test to check for any underlying problems that may not be immediately apparent. Issues such as vacuum leaks, faulty wiring, or a malfunctioning ECU may also affect the sensor’s performance.
Cleaning your MAP sensor is a practical DIY task that can lead to significant improvements in your vehicle’s performance and efficiency. By taking the time to maintain this small yet vital component, you not only enhance your driving experience but also promote the longevity of your engine. So, roll up your sleeves, grab your tools, and give your MAP sensor the care it deserves!
Remember, regular maintenance is key to a healthy vehicle. Don’t let a dirty sensor rob you of performance—take action and keep your engine running smoothly!
The Importance of Regular Maintenance
Cleaning your MAP sensor is just one aspect of a broader vehicle maintenance strategy. Regularly scheduled maintenance checks can help ensure that all components of your engine are functioning optimally. This not only enhances performance but also extends the lifespan of your vehicle. Think of your car as a finely tuned instrument; every part needs to work in harmony for the best possible outcome.
Signs It’s Time for a Check-Up
As you monitor your vehicle after cleaning the MAP sensor, look out for some common signs that indicate further maintenance might be needed:
- Check Engine Light: If the light remains illuminated even after cleaning, it may signal deeper issues.
- Poor Fuel Economy: If you notice a drop in miles per gallon, it could be due to various factors, including a failing MAP sensor.
- Rough Idling or Stalling: Any irregularities in engine performance warrant further inspection.
- Unusual Engine Sounds: Knocking, pinging, or sputtering sounds can indicate misfires or other issues.
DIY vs. Professional Help
While cleaning the MAP sensor is a straightforward DIY task, some vehicle owners may prefer to leave maintenance to professionals, especially if they are unsure about the steps or lack the necessary tools. A professional mechanic can provide a thorough diagnostic check, ensuring that your vehicle runs efficiently and safely. Weigh your comfort level and experience against the potential savings of doing it yourself.
Maintaining your MAP sensor is a small but important part of car ownership. By taking the initiative to clean it regularly, you can help prevent larger issues down the road. Remember, a well-maintained vehicle is not just about performance; it’s also about safety and reliability. Whether you’re tackling this project yourself or consulting a professional, staying proactive about your car’s health will pay off in the long run.
In the fast-paced world we live in, our vehicles are often our lifelines. They carry us to work, deliver our loved ones, and enable our adventures. Treat them with the care they deserve, and they will reward you with years of dependable service.
So, gear up, grab your tools, and embark on this small maintenance journey. Your car will thank you with smoother rides and better fuel efficiency, and you’ll feel a sense of accomplishment knowing you’ve contributed to its health!


Great information! I cleaned my MAP sensor following your guide, and I noticed an immediate improvement in my engine
Fantastic guide! The explanations were clear, and I loved that you mentioned potential issues that could arise if the sensor isn’t cleaned regularly. Very useful!
This article is incredibly helpful! I had no idea how important the MAP sensor was until I read this. The step-by-step guide made it easy to follow.
I found this article very informative. The tools required were clearly listed, and I felt confident tackling the cleaning process myself. Thank you!
This article is a lifesaver for DIY enthusiasts like me! The detailed steps made the whole process straightforward, and I’m glad to have learned something new about my vehicle.
I appreciate the safety tips included in this guide. It’s always better to be cautious when working on your car. Thanks for sharing such detailed instructions!