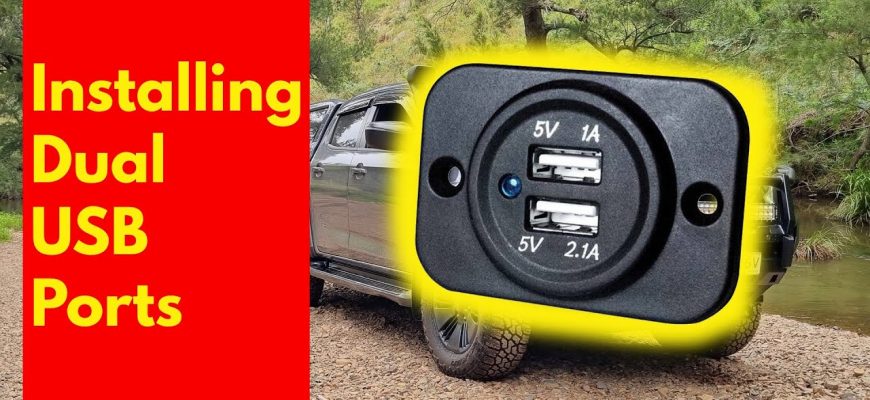
In today’s tech-savvy world, having a functional USB port in your car is not just a luxury; it’s a necessity. Whether it’s for charging your devices or connecting them for music playback, a faulty USB port can be a major inconvenience. Fortunately, replacing it is a task you can tackle yourself with the right tools and guidance. This step-by-step guide will walk you through the process of replacing the USB port in your car.
- Why Replace Your Car’s USB Port?
- What You’ll Need
- Step-by-Step Guide
- Step 1: Disconnect the Battery
- Step 2: Access the USB Port
- Step 3: Remove the Old USB Port
- Step 4: Install the New USB Port
- Step 5: Test the New USB Port
- Step 6: Reassemble the Dashboard or Console
- Step 7: Final Testing
- Additional Considerations for a Successful Replacement
- 1. Choose the Right Replacement Part
- 2. Keep the Work Area Organized
- 3. Document the Disassembly Process
- 4. Use Proper Tools
- 5. Be Mindful of Wires and Connections
- 6. Consider Additional Upgrades
- 7. Regular Maintenance
Why Replace Your Car’s USB Port?
Before diving into the replacement process, let’s consider why you might need to replace your USB port:
- Charging Issues: If your devices aren’t charging properly or the connection is intermittent, it may be time for a replacement.
- Data Transfer Failures: If you experience issues connecting your phone for music or navigation, a faulty USB port could be the culprit.
- Physical Damage: Signs of wear and tear, such as bent pins or broken plastic, can indicate that a replacement is necessary.
What You’ll Need
To replace the USB port in your car, gather the following tools and materials:
- New USB port (compatible with your vehicle model)
- Screwdriver set (flathead and Phillips)
- Trim removal tools
- Wire strippers and connectors (if necessary)
- Heat shrink tubing (optional, for protection)
- Electrical tape
- Multimeter (for testing)
Step-by-Step Guide
Step 1: Disconnect the Battery
Before starting any electrical work, ensure your safety by disconnecting the car battery. This will prevent any electrical shorts or shocks while you work on the USB port.
Step 2: Access the USB Port
Depending on your vehicle, the USB port may be located in the center console, dashboard, or under the armrest. Use trim removal tools to carefully pry off the panel covering the port. Be cautious not to damage any clips or surrounding materials.
Step 3: Remove the Old USB Port
Once you have access to the USB port, unscrew or unclip it from its housing. Disconnect the wiring harness attached to the port. If the port is soldered in place, you may need to use a soldering iron to detach it.
Step 4: Install the New USB Port
Connect the wiring harness to the new USB port. If wiring is involved, strip the ends of the wires and use connectors or solder them securely. For added protection, consider using heat shrink tubing. Secure the new port in its housing and reattach any screws or clips.
Step 5: Test the New USB Port
Before putting everything back together, reconnect the battery and test the new USB port. Use a multimeter to check for proper voltage and connect a device to ensure it charges and transfers data correctly. If everything works, you can proceed to the next step.
Step 6: Reassemble the Dashboard or Console
Once testing is complete, carefully replace the trim panel. Make sure all clips are securely fastened, and no wires are pinched or exposed. Double-check that everything is in its proper place before closing up.
Step 7: Final Testing
Reconnect the battery one last time and perform a final test of the USB port. Ensure that both charging and data transfer functions are operational. If all tests pass, congratulations! You’ve successfully replaced your car’s USB port.
Replacing the USB port in your car might seem daunting, but with the right tools and this step-by-step guide, you can complete the task efficiently. Not only will you restore functionality to your car’s tech, but you’ll also gain the satisfaction of having done it yourself. Remember, if you’re ever in doubt or uncomfortable with any step, consulting with a professional mechanic is always a good option.
Now that you know how to replace your car’s USB port, get started on restoring that essential connectivity!
Additional Considerations for a Successful Replacement
While replacing the USB port in your car can be a straightforward process, there are some additional considerations that can help ensure a successful replacement. These tips will enhance your experience and may save you time and frustration along the way.
1. Choose the Right Replacement Part
Before you begin the replacement, it’s crucial to select a high-quality USB port that is compatible with your vehicle model. Research online or consult your car’s manual to find the exact specifications. OEM (Original Equipment Manufacturer) parts are often the best choice, as they guarantee compatibility and performance.
2. Keep the Work Area Organized
As you disassemble parts of your car, keep screws, clips, and small components organized. Using a magnetic tray or small containers can help prevent losing parts, making the reassembly process much smoother.
3. Document the Disassembly Process
Taking photos as you disassemble can be beneficial for visual reference during reassembly. This step is especially helpful for intricate setups, ensuring you remember where each component fits.
4. Use Proper Tools
Using the right tools is essential for avoiding damage to your car’s interior. Invest in a good set of trim removal tools to prevent scratching or breaking any panels. Using a multimeter can also help diagnose any underlying electrical issues before you install the new port.
5. Be Mindful of Wires and Connections
When working with the electrical components, be careful not to pinch or damage any wires. Ensure that all connections are secure but not overly tight, as this can lead to future issues.
6. Consider Additional Upgrades
If you’re replacing the USB port due to age or malfunction, consider upgrading to a model with additional features, such as faster charging capabilities or multiple ports. This can enhance your driving experience and keep your devices powered up efficiently.
7. Regular Maintenance
After the replacement, keep an eye on the new USB port’s performance. Regularly check for any signs of wear and tear or connectivity issues. A little maintenance can go a long way in prolonging the life of your new component.
Replacing the USB port in your car is a rewarding DIY project that can significantly improve your driving experience. With careful planning, the right tools, and a bit of patience, you can restore functionality to your vehicle’s tech features. Remember to follow this guide closely, and don’t hesitate to seek professional help if you encounter any challenges. Enjoy your newly upgraded USB connectivity, and drive safe!

