
When it comes to maintaining your vehicle, a loose gas cap may seem like a minor issue․ However, it can lead to a variety of problems, including decreased fuel efficiency, increased emissions, and even triggering the dreaded check engine light․ Thankfully, fixing a loose gas cap is a straightforward process that you can manage with minimal tools and effort․ In this guide, we’ll walk you through the steps to ensure a secure fit for your gas cap․
- Why a Secure Gas Cap Matters
- What You’ll Need
- Step-by-Step Instructions
- Step 1: Inspect the Gas Cap
- Step 2: Clean the Gas Cap and Fuel Filler Neck
- Step 3: Secure the Gas Cap
- Step 4: Check for Proper Fit
- Step 5: Monitor for Warning Lights
- When to Replace Your Gas Cap
- Additional Tips for Maintaining Your Gas Cap
- Recognizing Signs of a Problem
Why a Secure Gas Cap Matters
A gas cap serves several critical functions:
- Preventing Fuel Evaporation: A properly sealed gas cap prevents fuel vapors from escaping into the atmosphere, which is crucial for both environmental protection and fuel economy․
- Maintaining Pressure: A secure gas cap helps maintain the necessary pressure in the fuel system, ensuring optimal engine performance․
- Preventing Contamination: A loose cap can allow dirt and debris to enter the fuel tank, potentially damaging the engine․
What You’ll Need
Before you begin, gather the following tools and materials:
- New gas cap (if the old one is damaged)
- Clean cloth or rag
- Gloves (optional)
Step-by-Step Instructions
Step 1: Inspect the Gas Cap
Start by visually inspecting the gas cap․ Look for any signs of wear, cracks, or damage․ If the cap appears damaged, you’ll need to replace it․ If it looks fine, proceed to the next step․
Step 2: Clean the Gas Cap and Fuel Filler Neck
Using a clean cloth, wipe down the gas cap and the fuel filler neck․ This helps remove any dirt, grime, or debris that might prevent a proper seal․ Ensure that both surfaces are completely dry before reattaching the cap․
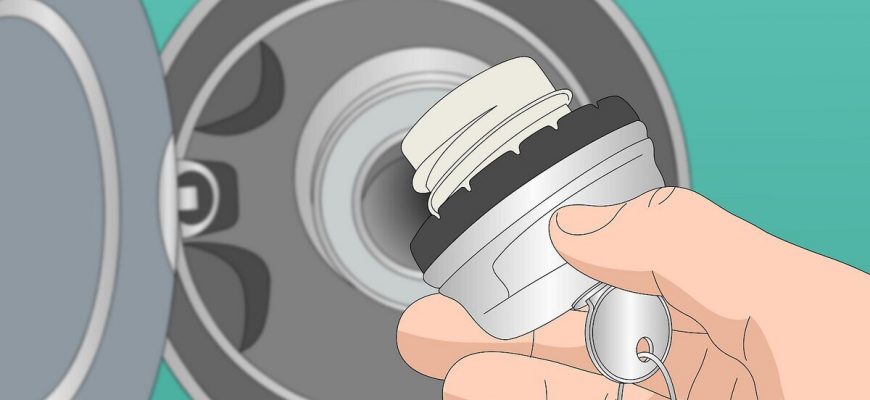
Step 3: Secure the Gas Cap
Align the gas cap with the fuel filler neck․ Turn the cap clockwise until you hear a click, indicating that it is securely in place․ If your gas cap has a locking mechanism, ensure it is engaged․
Step 4: Check for Proper Fit
After securing the cap, give it a gentle tug to ensure it is tight․ If it feels loose or moves easily, remove it and repeat the securing process․ A tight fit is essential for preventing leaks․
Step 5: Monitor for Warning Lights
Start your vehicle and observe the dashboard for any warning lights․ If the check engine light is illuminated, it may take a few driving cycles for it to turn off․ However, if it remains on after a few days, further diagnostic checks may be necessary․
When to Replace Your Gas Cap
If the gas cap continues to come loose or the warning light remains illuminated, it may be time for a replacement․ Here’s how you can determine this:
- If the threads are stripped or damaged, a new cap is necessary․
- If you notice cracks or significant wear, it’s time for an upgrade․
- Consult your vehicle’s manual for the correct specifications to ensure compatibility․
Fixing a loose gas cap is a simple yet essential part of vehicle maintenance․ By following these steps, you can ensure that your gas cap is secure, thus enhancing fuel efficiency and reducing harmful emissions․ If you encounter persistent issues, don’t hesitate to consult a mechanic for further assistance․ Remember, a little bit of attention to detail can go a long way in keeping your vehicle running smoothly!
Additional Tips for Maintaining Your Gas Cap
Once you’ve secured your gas cap, it’s wise to adopt a few habits to ensure it remains in good condition:
- Regular Checks: Make it a habit to check your gas cap during routine maintenance, like oil changes or tire rotations․ A quick visual inspection can prevent future issues․
- Handle with Care: When removing or tightening the gas cap, do so gently․ Avoid using excessive force, as this can strip the threads or damage the seal․
- Store it Safely: If you need to remove the gas cap temporarily—perhaps while filling up or during maintenance—ensure you place it in a clean, safe location․ Dirt or debris can easily contaminate the fuel system․
Recognizing Signs of a Problem
Even with a tight gas cap, other issues may arise that could affect your vehicle’s performance․ Here are some signs to watch for:
- Check Engine Light: If this light remains illuminated after securing the gas cap, it could indicate a more serious issue, such as a problem with the evaporative emission control system․
- Fuel Smell: If you notice a strong smell of gasoline, it could mean there’s a leak somewhere in the fuel system․ Inspect the gas cap and surrounding areas for any signs of fuel leakage․
- Decreased Fuel Efficiency: A sudden drop in miles per gallon (MPG) can signal that something isn’t right, potentially linked to a faulty gas cap or other fuel system issues․
A loose gas cap might seem trivial, yet it plays a crucial role in your vehicle’s overall performance and environmental impact․ By following the simple steps outlined in this guide, you can easily secure your gas cap and keep your vehicle running efficiently․ Remember, regular checks and proper handling can prevent future problems and ensure that your car remains in top shape․ So, next time you fill up, take a moment to check that gas cap—your vehicle will thank you!


Great tips on maintaining my vehicle! I had no idea that a loose gas cap could trigger the check engine light. Very informative read!
This article was super helpful! I followed the steps to secure my gas cap and it worked perfectly. Highly recommend this guide to anyone with a car!
Fantastic advice! The importance of a secure gas cap was something I overlooked. Now I
I appreciate the clarity in this article. The instructions were easy to follow, and now I feel confident checking my gas cap regularly. Thank you!
I love how detailed this guide is! The explanation about fuel evaporation really opened my eyes. Thanks for sharing such valuable information!
This article is a lifesaver! I never realized how important a gas cap was until I read this. The step-by-step guide made it super easy to understand.
Such an informative piece! It’s amazing how much a simple gas cap can impact fuel efficiency and emissions. Definitely worth reading!